In case you were wondering...

In case you were wondering...

This blog exists to encourage all those who have ever wanted--and needed!--a tiny getaway close to home. A workshop, playhouse, garden shed, sanctuary, mini-greenhouse, studio, home office; whatever it is you need, it IS doable, with some sacrifice, imagination, and compromise.

It helps if you're handy, too.

Showing posts with label shed. Show all posts

Tuesday, December 14, 2010

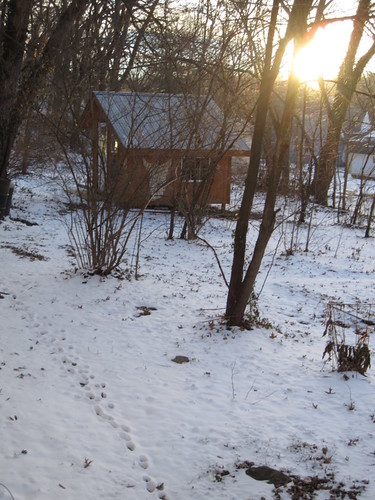
icy morning sunrise


Glowing in the cold...


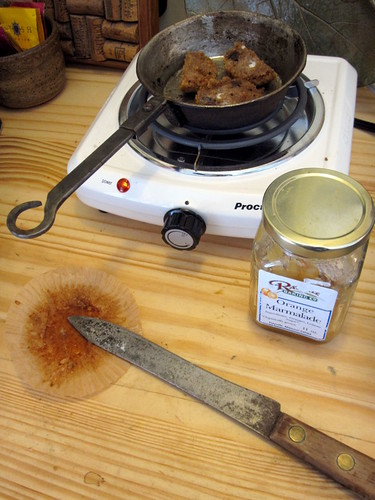
toasted muffin and marmalade

This warmed me up nicely...home made 7-grain/carrot/raisin muffin and marmalade...

Tuesday, August 31, 2010

Watercolor Artist Blog features the shed


Hi all--forgot to tell you that the Watercolor Artist blog mentioned the project, last week, in THIS POST.  (Of course it mostly just leads you here.:-) )

I was a contributing editor at Watercolor Artist for years, back when it was Watercolor Magic, with a regular column, and still do the occasional article.  (The current issue, October 2010, has a big one in it.)  (By the way, the term "contributing editor" really just means you contribute, not that you edit anything but your own stuff!)

Thursday, August 12, 2010

Lovely...hot out, though!


I'll try again with our old camera when I can, it is MUCH easier to do night settings on!  
This is pretty, though...

Monday, August 2, 2010

Floor paint


We've decided that for now, since they don't make my favorite pattern of vinyl flooring any more and we've spent almost enough on this project, we'd go with paint right on the plywood floor.  It's a bit rough, but then so is the floor in our 110+-year-old houses.

We looked at a variety of vinyls, tiles, cork, etc., and even thought about using another layer of underlayment on the floor that would be smoother than the plywood--but maybe we're getting tired!  Just wanted done, and usable, and this was quickest.  If we decide on something later, we can always put it over the painted floor.

Soooo...Joseph just poured it direct from the can and spread it with a roller.  YEAH.  Instant serenity.

My stencils have gotten moved somewhere, so I'll either get more or find them, or make one just for this project, to add a decorative touch here...I think I'm too tired for anything very complex, and we'll be using rugs in winter, anyway.


I can haz in?

This is the end of the shed workday yesterday; visiting kitty Peppy can't understand why he can't go inside, as usual!


This morning while it was still decent outside, J. did the second coat, cutting in around the perimeter with a brush; the remaining gap will be covered with a simple baseboard.  (Knee pads helped with this step!)


Then he did the second coat like the first, with the roller, after smoothing some of the rougher spots that were easier to see once they had the first coat of paint on them.

I sat on the deck and supervised  er, sketched while he worked.


OH yeah.  Looking GOOD.  Love that morning light...

We're planning to keep it pretty simple and uncluttered inside...a shelf at the top of that far wall, the desk, a couple of chairs, wastebasket, shelves on the south wall for books and art supplies, the coffee/tea/water station next to the French doors on the south, heater and that's it.

For now.  :-P
Sunday, August 1, 2010

Final coat of pale yellow paint on the walls...


Eeep, using thin plywood underlayment for the walls worked, except some panels kept bleeding through the paint!  It still shows a tiny bit, but 3 layers plus a texture layer is all it's going to get.  We'll never notice when there are shelves and books there...


This looks SO nice and fresh...and it worked fine on this wall...you can't see the texture in the photos, but it looks really good.  Interesting!


This is where the desk and chair will be, beside the low window--now we just have to finish the floor and get the baseboards and shelves in...

Friday, July 30, 2010

Life's little puzzles...


So.  Mark used construction adhesive meant for Styrofoam to attach the insulation to the underside of the shed.  It says right on it that this is the product for the job.

So why are two panels now lying on the ground UNDER the shed after a week or so?  Will they all let go?  As you can see in the second photo, they made good contact, originally. 

It wasn't a pleasant job, putting them up under there in the first place, I know.  Guess we contact the lumberyard and ask if they have any brilliant ideas...or the adhesive manufacturer.  Not thrilled here...

Wednesday, July 28, 2010

Painters' Progress


Yes, we're a little goofy, why do you ask? It's covered now, but we'll know it's there...


It's so lovely to have reached the stage where we can do it ourselves!  It's brutal, painting overhead, and we're both wiped out, but that part's almost done and as you can see we're working on the walls, too.  (MUCH faster using a roller on a smooth surface, let me tell you!)

We'll put a shelf right at the bottom of the rafters, here, with shaker pegs to hang things from...handy!


J.'s going to build screens for this window, too...though since I usually have the French doors open...

We had leftover ivory paint from our rehab project, as I said--it's satin, which looks rather nice and should be easy to clean.  Today, I'm having J. mix just a bit of leftover yellow in to warm the color for the walls; I'm going to texture them with some drywall mud added to the paint to provide some interest and hide some of the unevenness of walls done with plywood underlayment.


I've done that before in our old bathroom, and it looked great!  Rather like rough plaster...though then it was drywall powder and this time we have a paste-like compound.  Hope it works as well!

Apparently our 2 x 4 studs weren't all that 2 x 4, and the underlayment may not have been exactly the same thickness, either--some was leftover recycled, and some was new. Anyway some of the seams have about 1/8" between the surfaces.  I filled with wood putty, and the texturing will help, too. Not a biggie, I'll just hang a sketch over goofy places!

Now, then...what color to paint the floor?!  (Yes, for now we've decided on paint, right on the plywood.  Faster, and cheaper...)  Right now, it looks like Jackson Pollock went nuts painting a snowstorm in Alaska...

Monday, July 26, 2010

Missing Naomi...


Oh, my.  I had to have exposed rafters and beadboard ceilings.  Forcing paint into all those little crevices...

When we did the painting at the former drug house next door, Miss Naomi and her wonderful husband John helped; we had a ball.  Lots of work, lots of laughter, and pizza after.  They live in SF now, siiiigh.  We had Naomi's dad do one room over there, too, when he moved back here from Tennessee; Dubois was a professional painter for years--he's in SF now, too!  Boy, do I miss them. 


(Yes, of course for a lot of reasons!  But painting uneven surfaces overhead tends to make the missing more immediate...)

Nomes almost never gets a DROP of paint on herself--I looked like I'd dumped the bucket over my head.  Working overhead is rough in the best of times, but rafters and beadboard...eeeep.

And I had reason to think of The Wisdom of Mark, who suggested clear varnish.  YEAH.  If I'd missed a spot then, it wouldn't show!  Still lots of places to cut in with a paintbrush...

Brutal, but it's going to be SO nice.  I really did want to do it myself...and I'll be glad.  SOON.  Reaaaaaaaaaallll soon..........

Sunday, July 25, 2010

On our own...


Last night we sat on the little deck and celebrated! It was cool and delightful after the rain, the sky faded from orange to peach to black, the snowy tree crickets and katydids serenaded us, and it felt wonderful.


The weather's been perfect since the rain last night, so I thought I'd get what I could done before it got hot.  It never did, so I just kept working till I hit the wall around 4 this afternoon!  (The desk will go right by this window.)


Joseph caught me painting, this morning; if I'd known he was going to get the camera, I'd probably have brushed my hair before starting to work!


Looks pretty, doesn't it...

Friday, July 23, 2010

And this is what a shed with the Good Housekkeping Seal of Approval looks like!


Joe, the incredibly nice young code inspector, squeezed us into a busy day today, after the electricians forgot to call the codes department yesterday. (They normally need a 24 hour notice, which they would have had...but oh well, glad I called to follow up this morning! I really hated to have this hang on over ANOTHER weekend...)

The woman in the codes department asked me what else we needed an OK on, when I told her we needed to go ahead and make some progress--and I thought really, I have no idea, given all the changes and differing opinions!

We wanted to finish backfilling the trench, but didn't know if they needed to see THAT. We're going to paint, but I was concerned they might want to see the wiring inside the wall, even.

Nope, as it happens...

SO. He checked out what he needed to, we had a nice visit, he absolutely gets what the shed is all about, and while we were at it I asked him about the privacy screen I want to put up at the corner of the lot--it's fine, too.

So we're good to go!

J. got the deck light up, we did some landscaping over the trench, and we're ready to move inside and get that done...whew. I feel like I can breathe, now...

Monday, July 19, 2010

Dreaming and planning


Just noodling a bit...room for the small drafting desk, 2 chairs, and a stand for coffee, plus shelves for storage. So far, after living with it for weeks, looks like this should work...


Meanwhile, a progressive page, the top two sketches done weeks ago before we found the back window, and the bottom one today, thinking about how interesting it would be to use that odd board that mark offered me as backing for the security/deck light. We have to put something there, between the two trim boards, why not something cool like this?

LinkWithin

Related Posts with Thumbnails